

In this guide I will show you how to install MailWizz on a VPS server (ubuntu).
Many Ways You Can Install Mailwizz On Vps Server. In My Post i will Install Mailwizz On Webmin .
Webmin is a web-based system configuration tool for Unix-like systems.
List of VPS Hosting Providers Offering Open Port 25
- Vps Provider With Port 25 Open
- dartnode
- rarecloud
- Contabo.
- Ultahost
- Servebyte.
- OVH.
- Alexhost
- Knownhost
- Racknerd
- Turnkey internet.
- Vpsbg
- Hostwinds
Mailwizz Installation Steps:-
1. Install Webmin
2. Install Mailwizz
1. Install Webmin
Plz Check My Webmin Post. Complete Webmin Installation Guide.
After Install Webmin Follow These Steps
2. Install Mailwizz:-
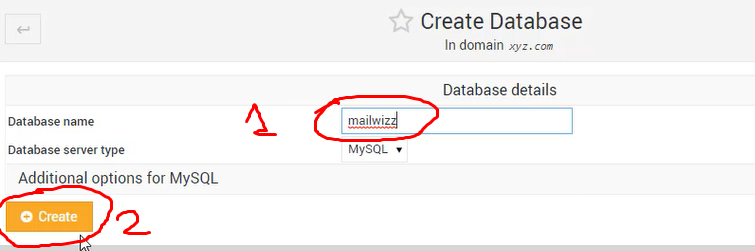
1. Create Database :-
First Go to virtualmin Panel And Then Click To Edit Database->Create A New Database ->Put Database Name->Click Create.

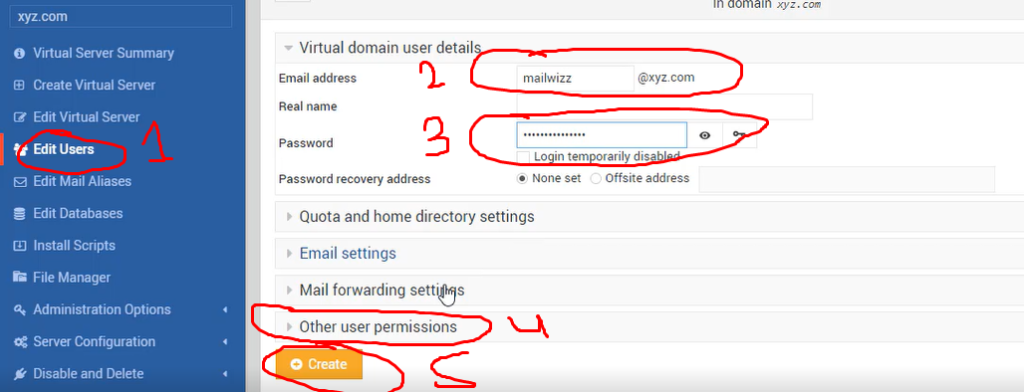
2. Create User :-
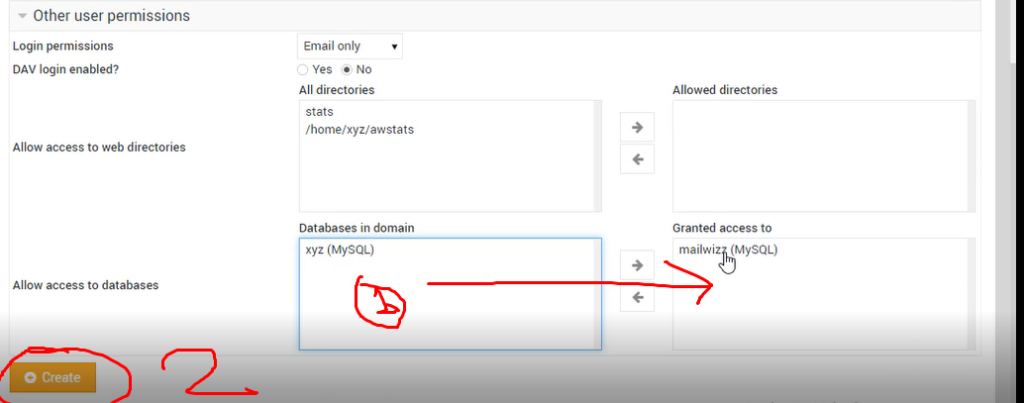
Edit User ->Create New User ->Put Your Details-> Other User Permissions-> Allow Database To Access -> Then Click Create.
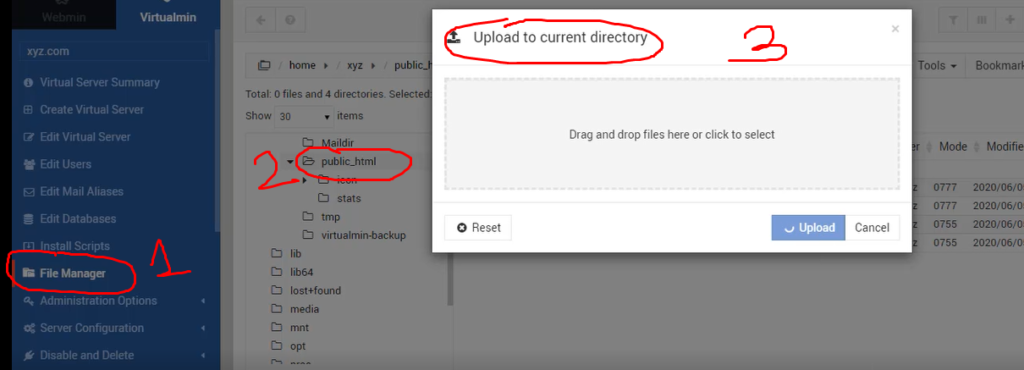
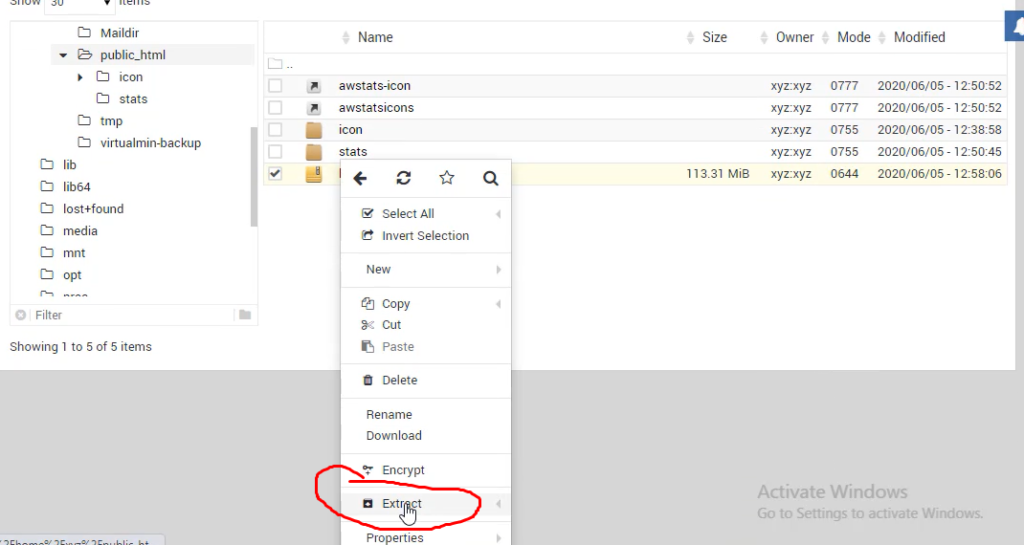
3. Mailwizz File:-
First Go to File Manager ->Public_html ->Upload To Current Directory->Select Your File And Upload->Extract Zip FIle.
Now Mailwizz files are in the Public_html folder directly.
4. Setup Mailwizz:-
Start Mailwizz Installation by opening your web browser and opening the URL: Your_Domain/install
Now, Enter your purchase code, Agree on the terms and click Next.
Install PHP extensions required by Mailwizz
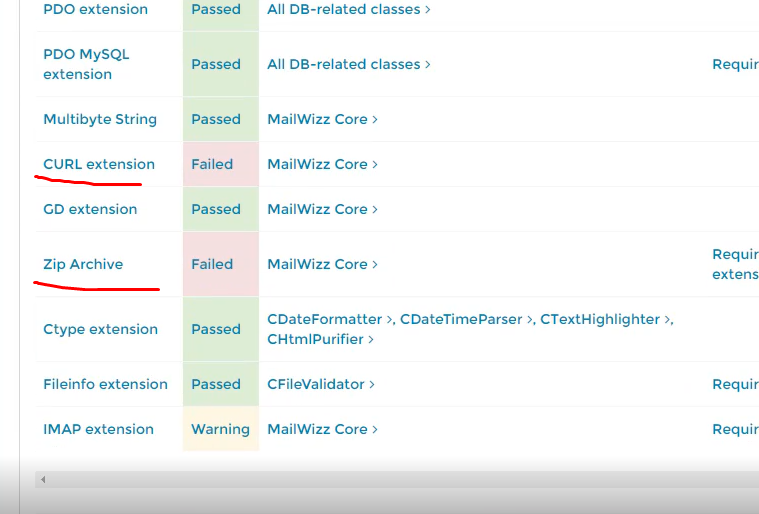
Simply run the following commands:
Install PHP 7.2
sudo apt-get install php7.2 php7.2-cli php7.2-commonInstall most commonly used PHP extensions
sudo apt-get install php7.2-curl php7.2-gd php7.2-json php7.2-mbstring php7.2-intl php7.2-mysql php7.2-xml php7.2-zipapache restart
/etc/init.d/apache2 restartNow, click next. Need folder permissions Then Simply run the following commands:
sudo chmod -R 777 /folderpathIn the Next Page Enter your Database info.
In Next Steps You Need To Setup Your Cron Jobs
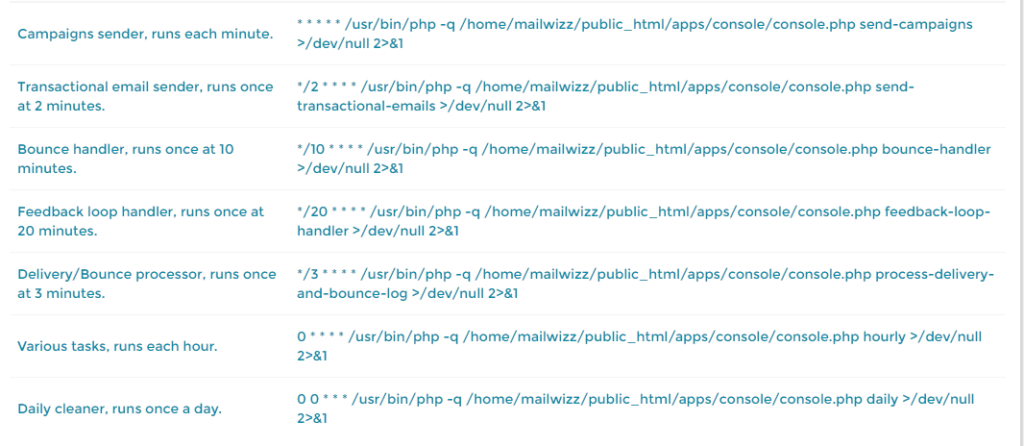
Go to Webmin And Search scheduled Cron Jobs -> Create a New cheduled Cron Job
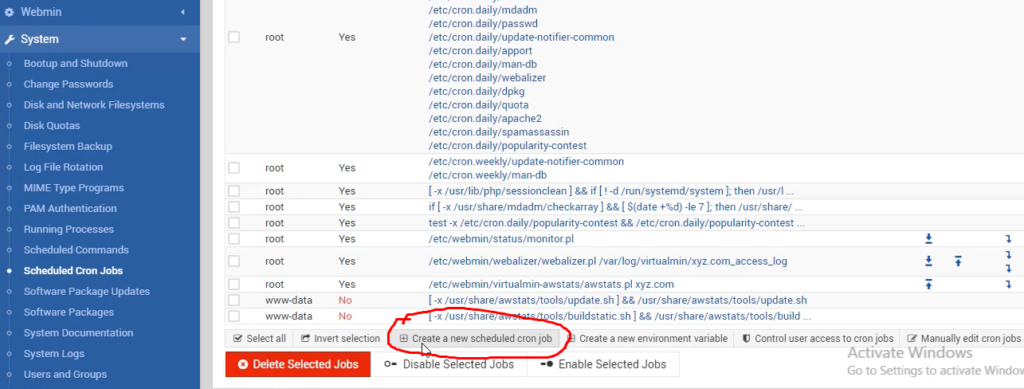
Execute Cron Job (Put Your Username) -> Command ( Copied your Mailwizz cronjob)->Select Time And Create.

Great. MailWizz Installed.
Now Run Simple Url TO Login On Your Mailwizz Admin Panel
Mail Software Admin Panel
Url = https://yourdomain.com/backend/index.php
Mail Software Customer panel
Url = https://yourdomain.com/customer/index.php