

PowerMTA is the world's top mail server, PowerMTA5.0r3 is the latest version of PowerMTA, with better performance, a single server can deliver dozens of millions of mails per day, here I use PowerMTA5.0r1 version , the following describes installation steps
Are you looking to enhance your email delivery system's efficiency and reliability? PowerMTA is a robust email delivery solution known for its high performance and deliverability. In this guide, we'll walk you through the process of installing PowerMTA on CentOS 7, ensuring seamless integration and optimized performance.
Preparation tools:
- PMTA5.0r1 installation package
- WinScp, Putty tools
- Purchase a good domain name
- Vps Server With Port 25 Open.
Digitalocean 100$ Free Credit
. Vps Server
The second thing you will need is a VPS server. a public server to install & Setup SMTP.
In My Post i Am Using Digitalocean Vps Server.
Here is a list of some companies:
List of VPS Hosting Providers Offering Open Port 25
- Vps Provider With Port 25 Open
- dartnode
- rarecloud
- Contabo.
- Ultahost
- Servebyte.
- OVH.
- Alexhost
- Knownhost
- Racknerd
- Turnkey internet.
- Vpsbg
- Hostwinds
1. Software Need
-Putty
PuTTY is a free and open-source terminal emulator, serial console and network file transfer application.
2. Install Process
:-First Create a Vps Server.
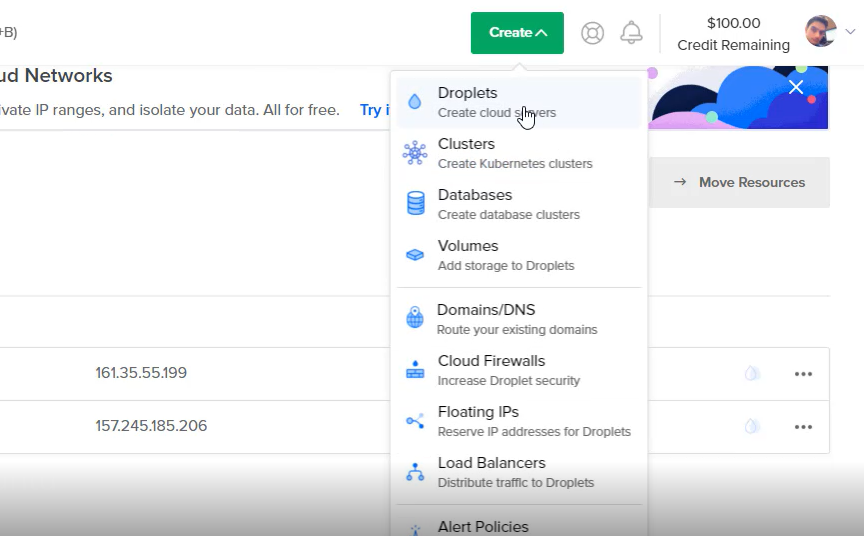
- Go to Digitalocean And Create A Droplet
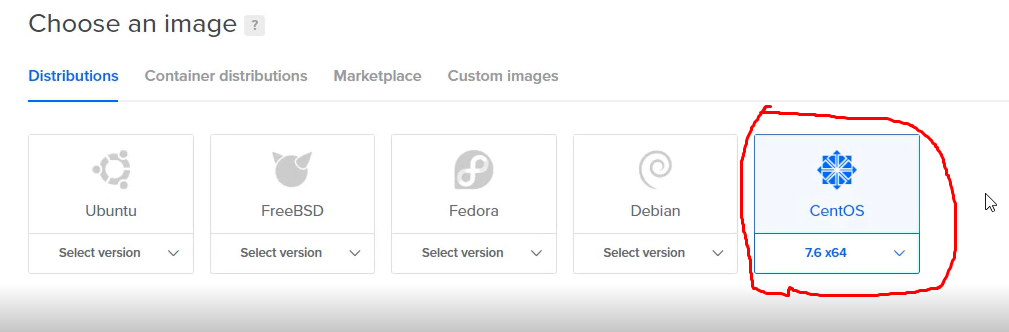
2. Choose an image
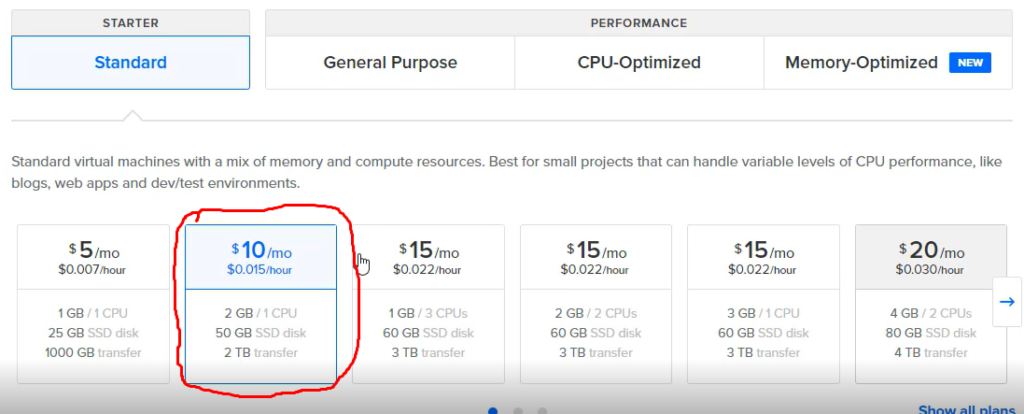
3.Choose a plan (i am using $10 machine)
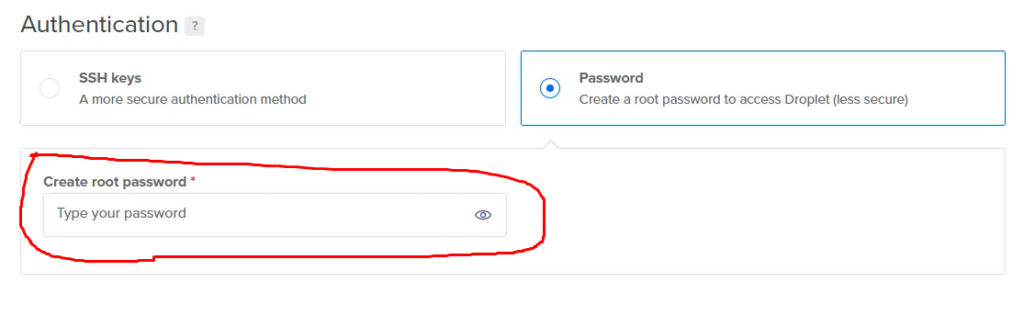
Enter Your Root Password:-
4.Choose a hostname
In Hostname Put Your Domain Name. i am Using Server.icsindiahost.tk. server is sub domain. Server.yourdomain.com
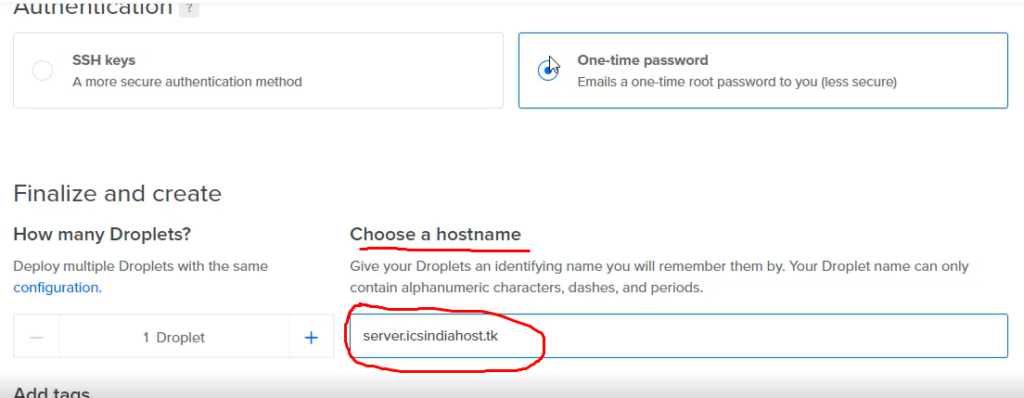
5.Now Click Create droplet. Few Minutes After You Receive a Email.
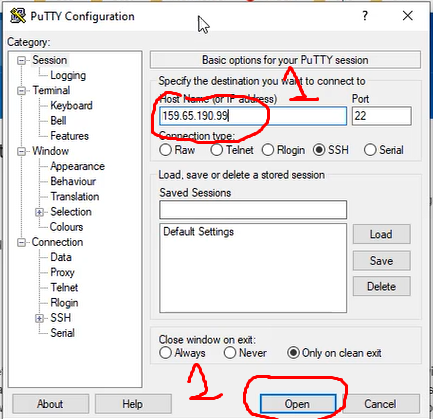
:-Install PowerMta Mail Server Using Putty
- First Open Putty Software And Put Your Server Ip Address.
2. Now Login as Root User .
3. Vesta Control Panel Install:-
- # Connect to your server as root via SSHssh [email protected]
- # Download installation script curl -O http://vestacp.com/pub/vst-install.sh
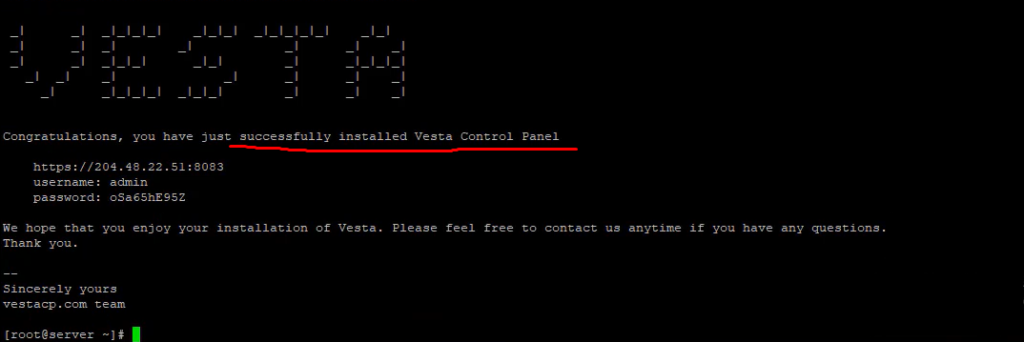
- # Run it bash vst-install.sh
- The installation is complete
4 .Install PowerMTA:-
1.Upload the PMTA5.0r1 installation package Using Winscp Software.
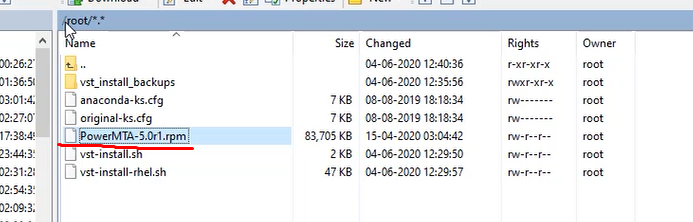
2.Second, install the PMTA5.0 mail system
rpm -Uvh PowerMTA-5.0r1.rpm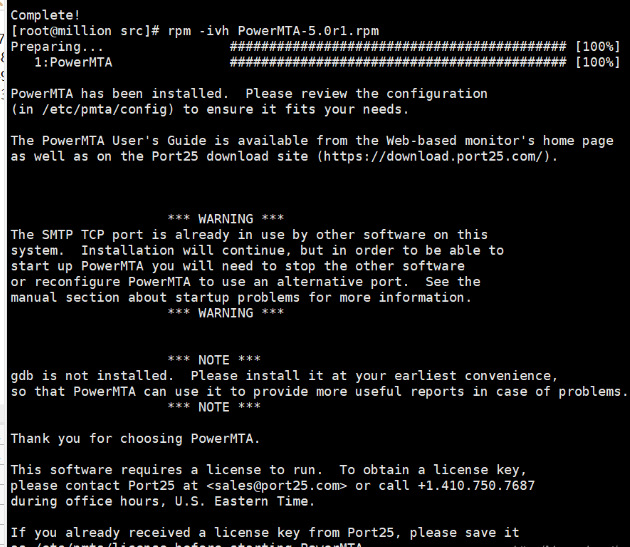
PowerMTA Installed Successfully. Now You Need Configure Some File.
Then Copy your license file to /etc/pmta/ and you are done!
3. Configure config file:-
Config file located in /etc/pmta/ directory just open it so we edit and configure.
You will find a place where you can change the IP address And Also Find a Place Where You Can Change Your domain Name.
Now restart PowerMTA service using the following command:
service pmta restartConfiguration Is Complete.
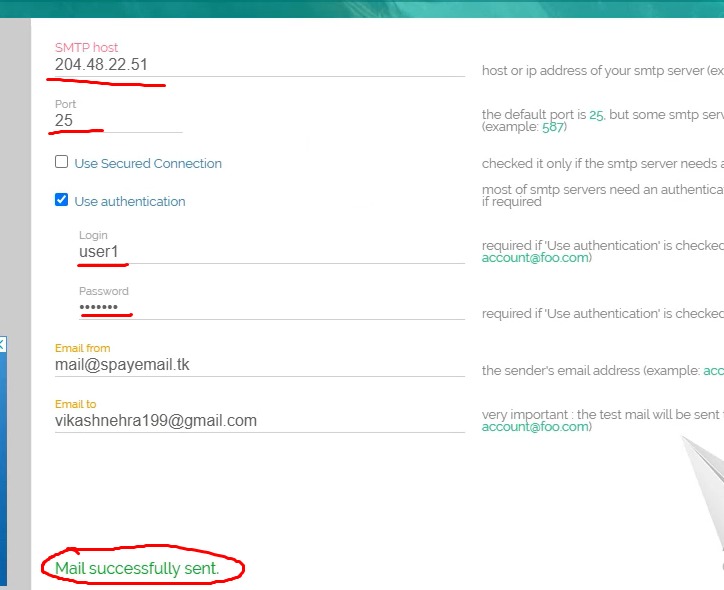
4. Send a Test Email:-
Hostname: Your Ip Server Ip Address/domain Name
Username: Your in config file
Password: Your password XXXXX from the section in config file
Port: 25
Go to SMTPER.NET and enter your server details as follows:
installation and configuration PowerMTA Completed.
Configure SPF, DKIM and DMARC:-
Dkim (DomainKeys Identified Mail) :–
Run the following commands:
1: openssl genrsa -out dkim.private.key 1024
2: openssl rsa -in dkim.private.key -out dkim.public.key -pubout -outform PEM
Now Open Dkim.public.key File and copy dkim code.
Dkim Format
"v=DKIM1; k=rsa; p=Your Dkim Code"Now Open your DNS zone in and add the following record
SPF (Sender Policy Framework):–
To set up SPF. Open your DNS zone in and add the following record:
v=spf1 a ip4:XXX.XXX.XXX.XXX ~allXXX.XXX.XXX.XXX = Replace with your server IP.
DMARC (Domain-based Message Authentication, Reporting & Conformance):–
Open your DNS zone in and add the following record
v=DMARC1; p=none; fo=1; rua=mailto:[email protected]; ruf=mailto:[email protected]Conclusion: By following these steps, you can successfully install PowerMTA on CentOS 7 and optimize your email delivery infrastructure for enhanced performance and reliability. PowerMTA's robust features and flexibility make it a preferred choice for businesses seeking to maximize their email deliverability rates. Start leveraging the power of PowerMTA today to streamline your email marketing campaigns and communication efforts.