

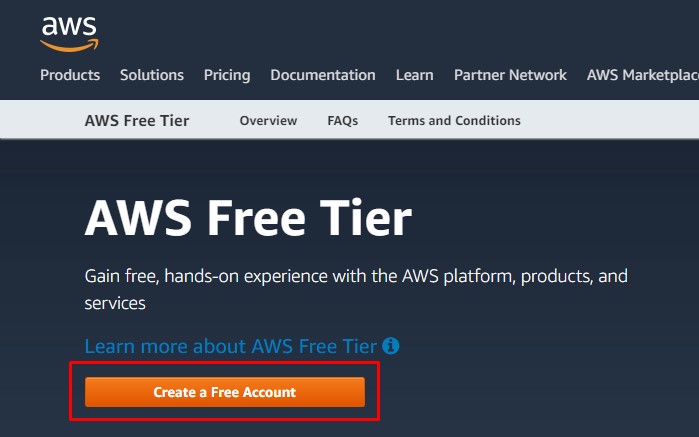
In This AWS Lecture, We Will Discuss Create Amazon Web Services Free Account. AWS is Providing 12 Months Of Free Tier Account To New User. After creating an Amazon AWS account, you can enjoy a 12-month free tier and start using all services provided by AWS in various regions around the world.
Create AWS Free Account
Requirements:-
- An email address
- A master or visa credit card
Aws registration
Create Account
- Please go to the Amazon Web Services homepage .
2. Choose to create an AWS account .
Note: If you have recently logged in to AWS, the button may appear to log in to the console .
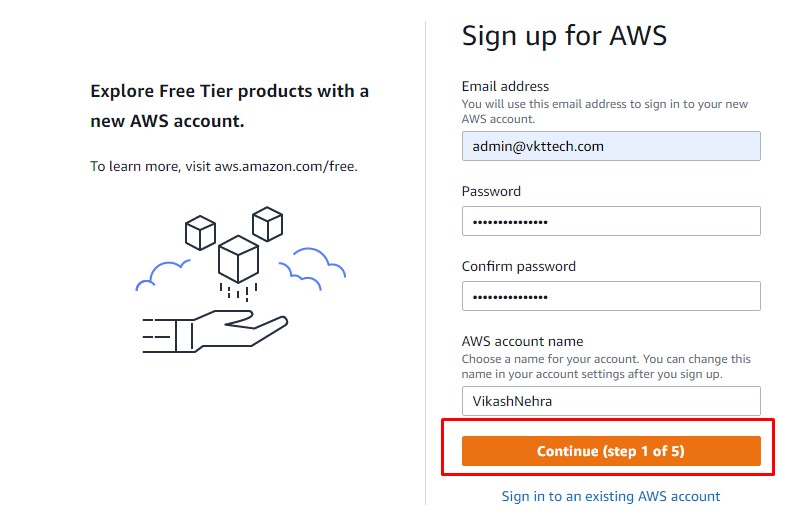
3. Enter your account information and select Continue .
Important note: The account information must be entered correctly, especially the email address. If you enter an incorrect email address, you will not be able to access your account. If Create a new AWS account is not displayed , first choose Sign in to a different account , and then choose Create a new AWS account .
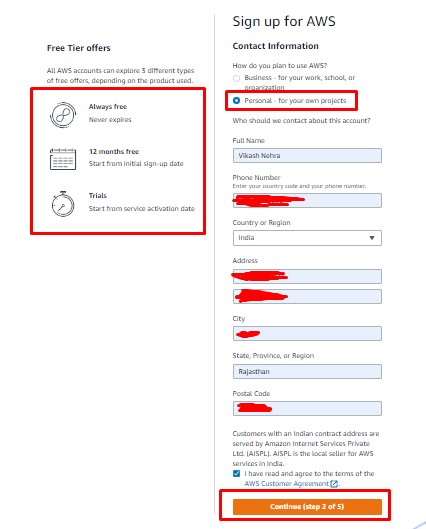
4. Choose Personal or Professional .
Note: Personal accounts and professional accounts have the same features and functions.
5. Enter your company information or personal information.
6. Read and accept the AWS customer agreement .
Note: Please be sure to read and understand the terms of the AWS Customer Agreement.
7. Choose Create Account and Continue .
8. Add payment method
On the payment information page, enter information about the payment method, and then select Secure submission .
Note: If you want to use a different address for your AWS account, please select Use new address first , and then select Secure submission .

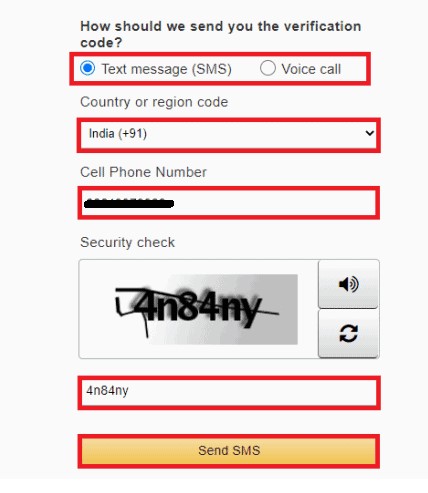
9. Verify your phone number
Choose whether to verify your account via Text message (SMS) or Voice call .
Select your country or region code from the list.
Enter a phone number that will be able to reach you in a few minutes.
Enter the code shown in the verification code.
When you are ready, choose to contact me . After a while, the automated system will call you.
Note: If you choose to verify your account via SMS, please select Send SMS .
Enter the PIN received via SMS or voice call, and select Continue .
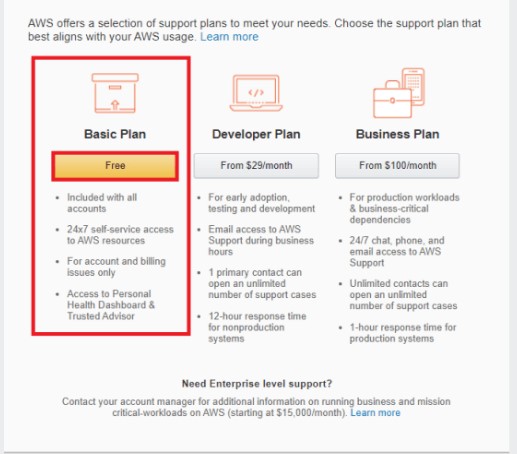
10. Choose an AWS Support plan
On the Select a Support Plan page, select an available support plan. For an explanation of the available Support plans and their advantages, see Comparing AWS Support Plans .
11. Wait for account activation
After selecting the support plan, the system will display a confirmation page indicating that your account is being activated. The account is usually activated within a few minutes, but it can take up to 24 hours.
You can log in to your AWS account during this period. Even if you have completed all the steps in the registration process, during this time, the AWS home page may continue to display a “Complete Sign Up” button.
After your account is fully activated, you will receive a confirmation email. After receiving this email, you will have full access to all AWS services.
Troubleshoot account activation delays
Account activation may sometimes be delayed. If the process takes more than 24 hours.
12. Congratulations! You have now successfully created an AWS account!