

In This AWS Lecture, We Will Discuss Create Amazon EC2 Instances. Amazon Web Services (AWS) began to provide IT infrastructure services to enterprises in the form of Web services, which is now commonly referred to as cloud computing. One of the main advantages of cloud computing is the ability to replace up-front capital infrastructure expenses with lower variable costs that scale according to business development.
What is Amazon EC2
EC2 (Elastic Cloud Compute) is the service where you can create servers to launch your websites or applications.
EC2 Instance Types
- General Purpose EC2 Instance
- Compute Optimized
- Memory Optimized
- Accelerated Computing
- Storage Optimized
Create Amazon EC2 Instance
Step 1:- Use your credentials to log in to your AWS account.
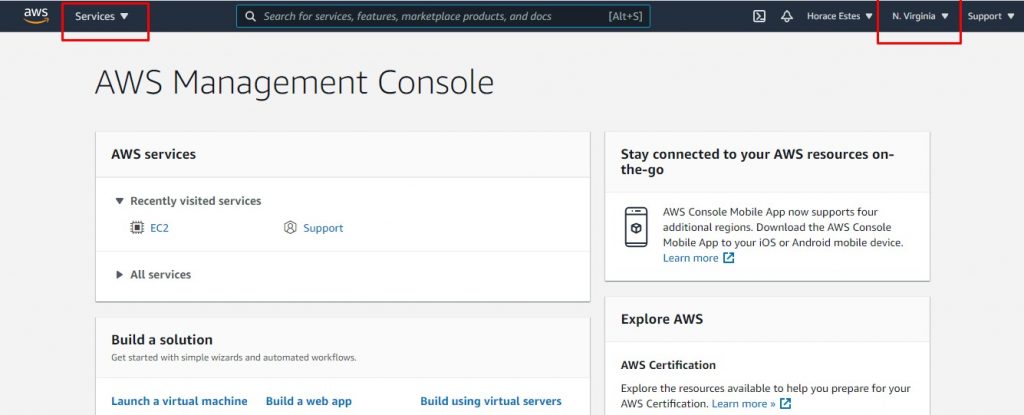
Step 2:- Click on Services and you will see the following screen
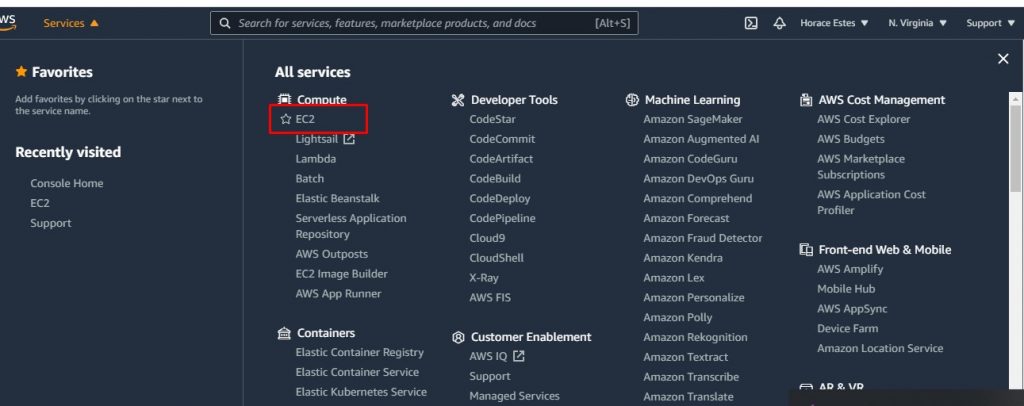
Step 3:- Click EC2, you will see the following screen:
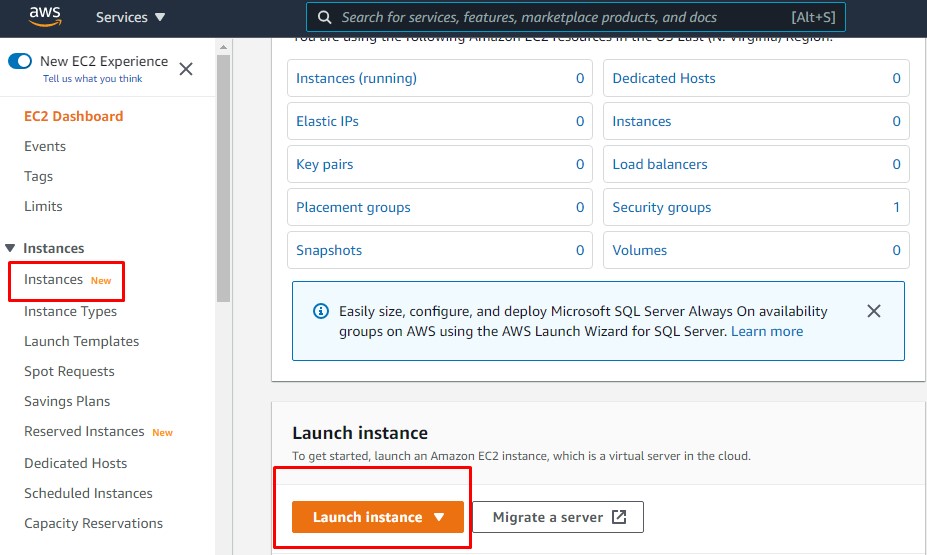
Step 4:Click to start the instance and you will see the following screen. Basically, you will find all available AMIs here.
According to Amazon, “An AMI is a template that contains the software configuration (operating system, application server, and applications) required to launch an instance. You can choose an AMI provided by AWS, our user community, or AWS Marketplace. Or You can choose one of your own AMIs.”
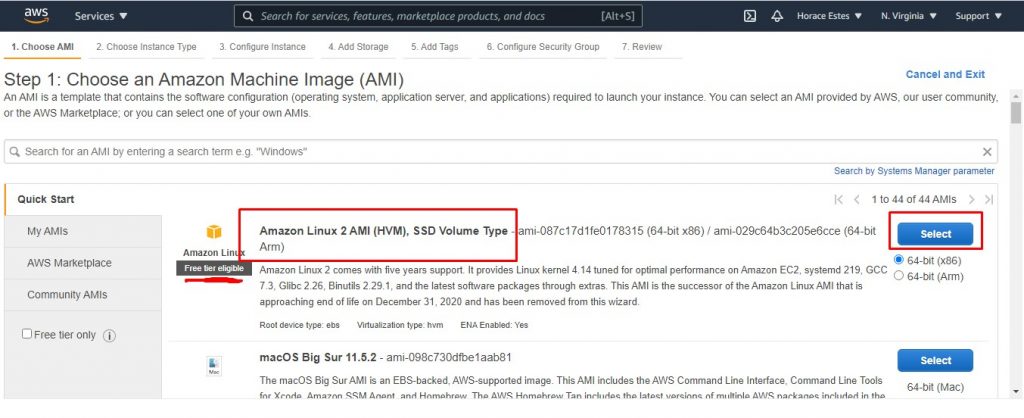
If you want to view the “free tier only” AMI, just check the box in front of the “free tier only”.
Step 5:- We will select the ” Amazon Linux AMI ” AMI by clicking the ” Select” button in front of it .
It has the following configuration:
Amazon Linux AMI is an image supported by EBS and AWS. The default image includes AWS command line tools, Python, Ruby, Perl, and Java. The repository includes Docker, PHP, MySQL, PostgreSQL and other software packages.
After clicking “Select”, the following screen will be displayed:
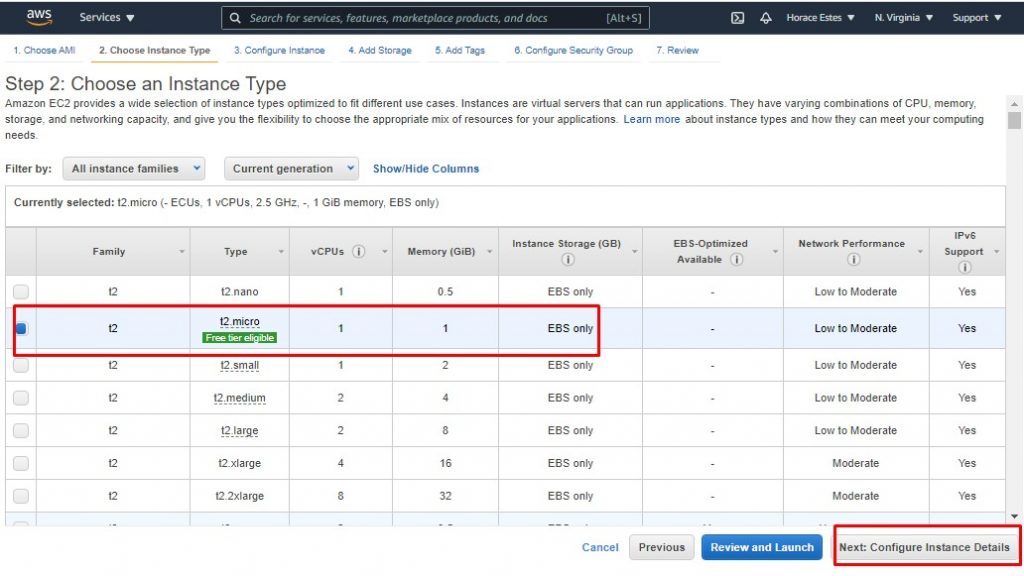
Here, you can select “instance type”.
According to Amazon
“Amazon EC2 provides a variety of instance types to choose from. These instance types are optimized to suit different use cases. Instances are virtual servers that can run applications. They have different combinations of CPU, memory, storage, and network capacity, giving you flexibility Choose the right combination of resources for the application.”
For a detailed list of the various instance types available in AWS, please check
EC2 instance types. It tells you the functions of the various instance types and the use cases in which they can be used.
Step 6:- We will choose the default value t2.micro, which comes from the universal series and is free. Click the “Next: Configure instance details” button, and you will see the following screen.
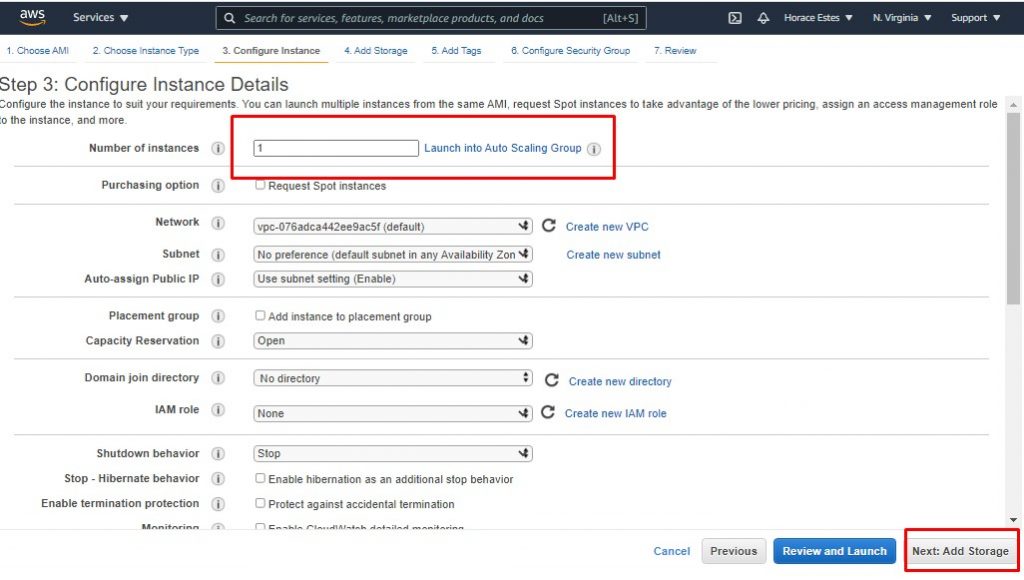
By default, it will be filled with 1, which means that only 1 EC2 instance will be created.
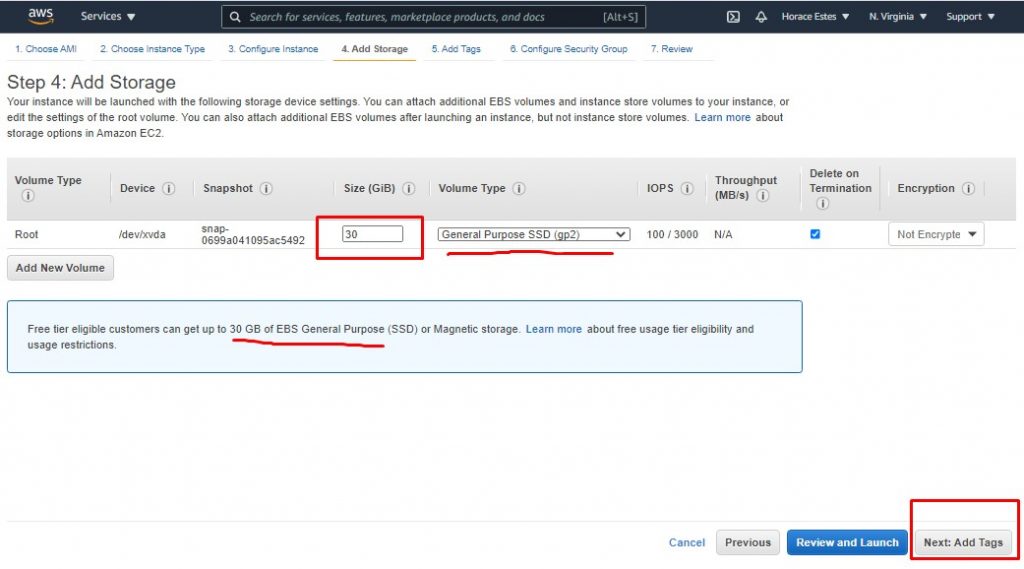
Step 7:- Click Add Storage and you will see the following screen. Here, you will see the default storage provided by AWS for your t2.micro instance. This storage is called EBS or Elastic block storage. You can think of it as the hard disk of your computer. In addition to this default storage, you can also click “Add new volume” to add more EBS volumes.
Step 8:- Click “Next: Add tags”, you will see the following screen:
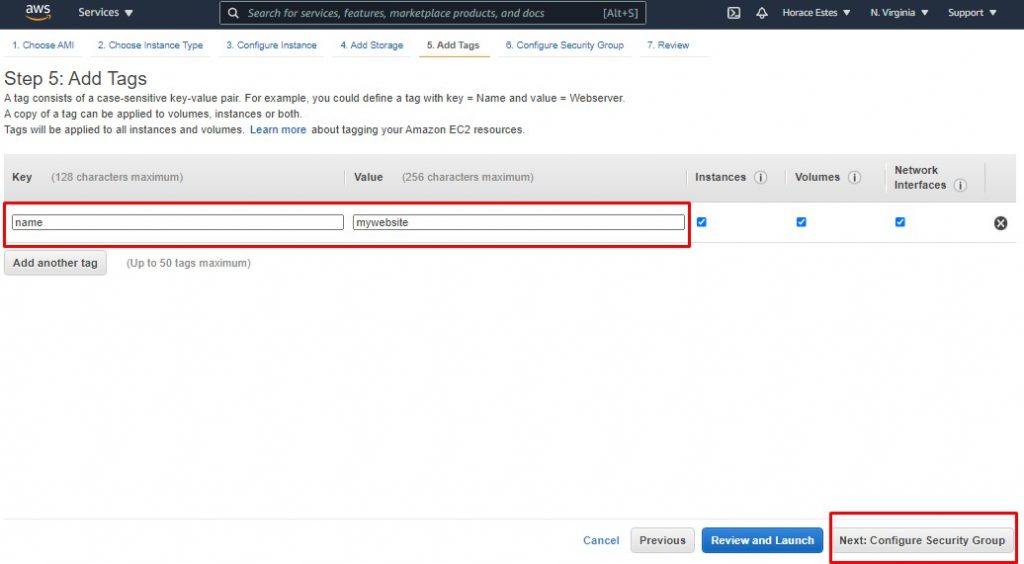
Tags are basically key-value pairs that can be used to assign some names to EC2 instances. For example, you might be spinning that EC2 instance to use it as a web server, in which case you can use the key as the “name” and the value as the “mywebsite”.
Let's go ahead and add tags by clicking Add Tag.
Step 9:- Click the “Next: Configure Security Group” button, and you will see the following screen:
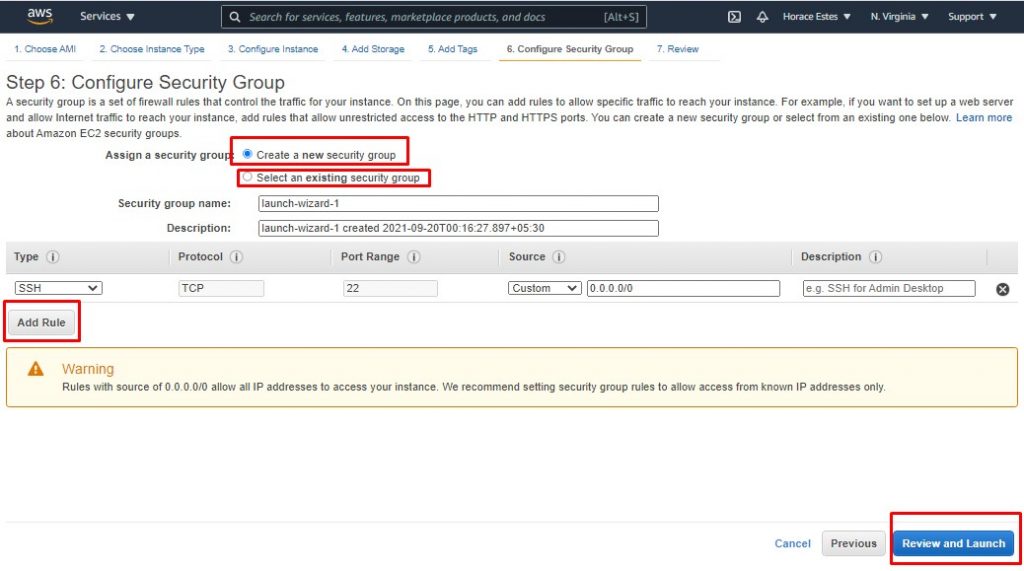
The security group basically defines the traffic allowed to enter the EC2 instance and the traffic allowed from the EC2 instance.
By default, as you can see, there is an entry indicating that your EC2 instance can connect from anywhere on the Internet (0.0.0.0/0) via SSH and TCP protocols on port 22.
Step 10:- Click the “View and Launch ” button, and you will see the following screen:
Step 11:- Click the “Start” button, and you will see the following pop-up window. You can see that this pop-up window is used to create a key pair, and you can use the key pair to enter your EC2 instance via SSH. This is to ensure that only authorized persons can obtain a valid private key and can only access the EC2 instance
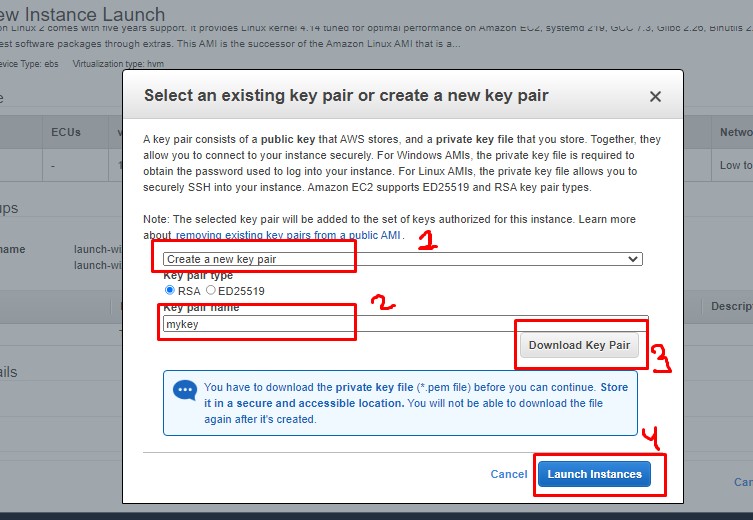
Give the key pair a name, such as “mykey”, and then click the “Download Key Pair” button. It will save the key pair on the local computer.
Step 12:- Click the “Start Instance” button, and you will see the following screen:
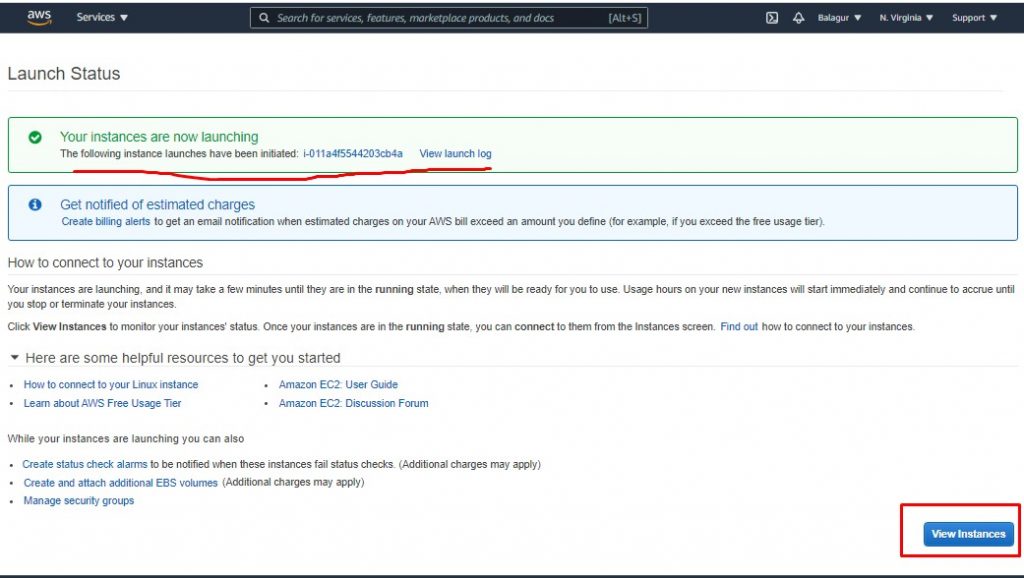
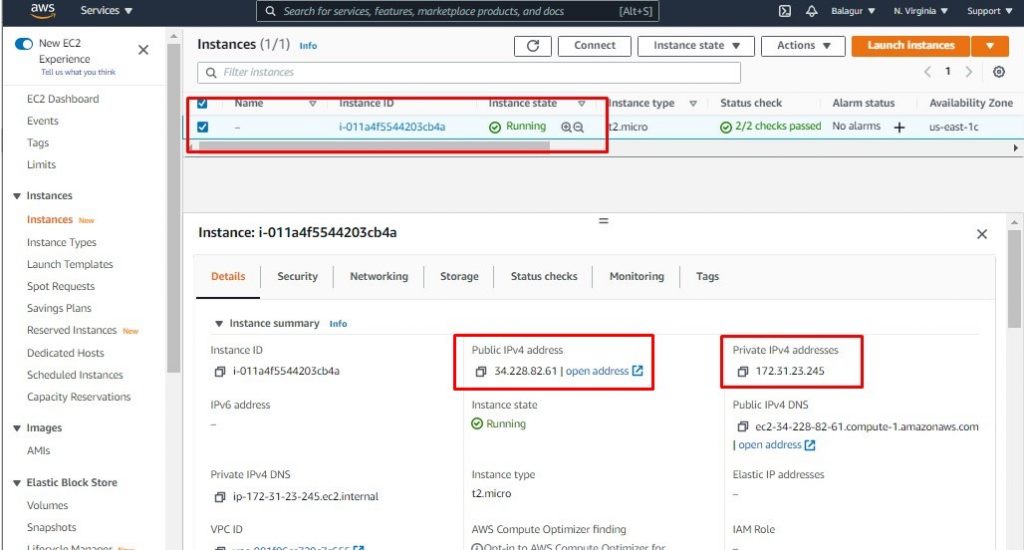
Step 13:- Wait 1-2 minutes, you will see your EC2 instance is running
Connect to EC2 host via PUTTY
Step 14:- Copy Public IPv4 address And Open Putty Software.
Step 15:- first, use puttygen to convert the mykey.pem file downloaded when the instance is started into a ppk file that can be used by putty.
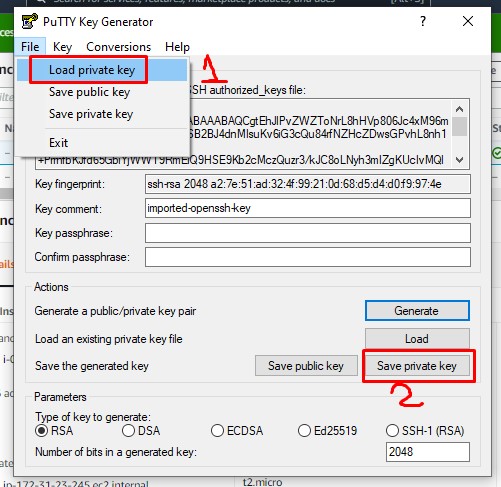
Open puttygen
File –> Load private key –> select mykey.pem (please select the file type . )
Click the “Save private key” button
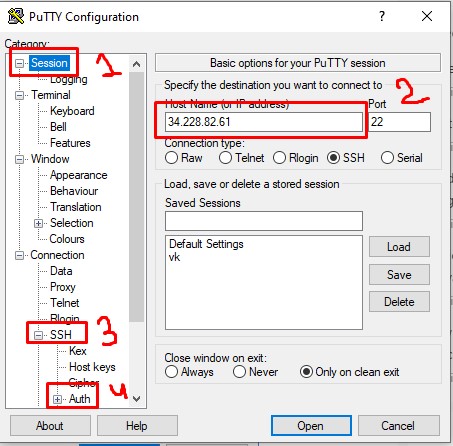
Step 16:- In the order on the picture
Click Session
Enter the public IP address of the AWS EC2 host
Click SSH
Click Auth
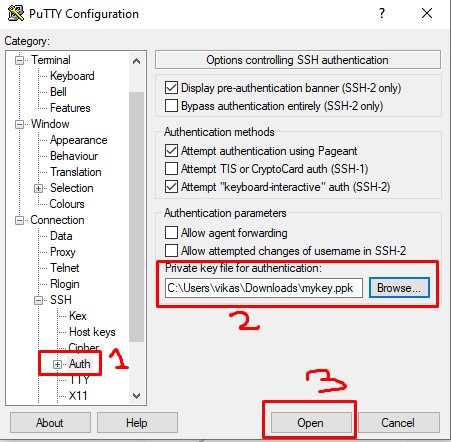
Step 17:- Select the .ppk file converted in the previous step and click the “Open” button
Step 18:- Enter the user name: because the image we chose is Amazon Linux 2 AMI, here we use the user name: ec2-user
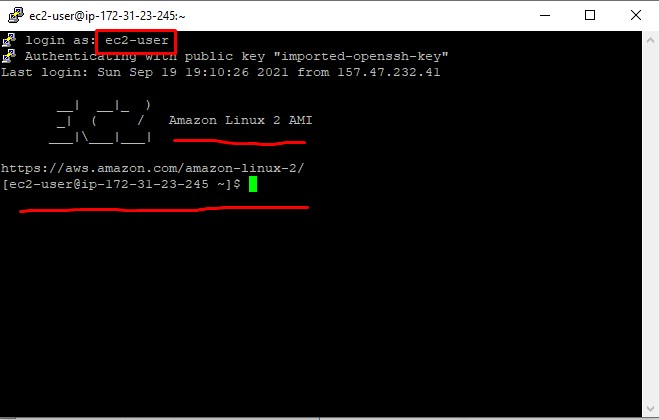
The EC2 host is created, and you can deploy your own application.