
In this article, we will focus on how to install WordPress on CentOS 7. WordPress is a free and open-source content management platform based on PHP and MySQL. It’s the world’s leading blogging and content management system with a market share of over 60%, dwarfing its rivals such as Joomla and Drupal.
In This article i am using digitalocean Vps
Popular VPS provider with Open port 25
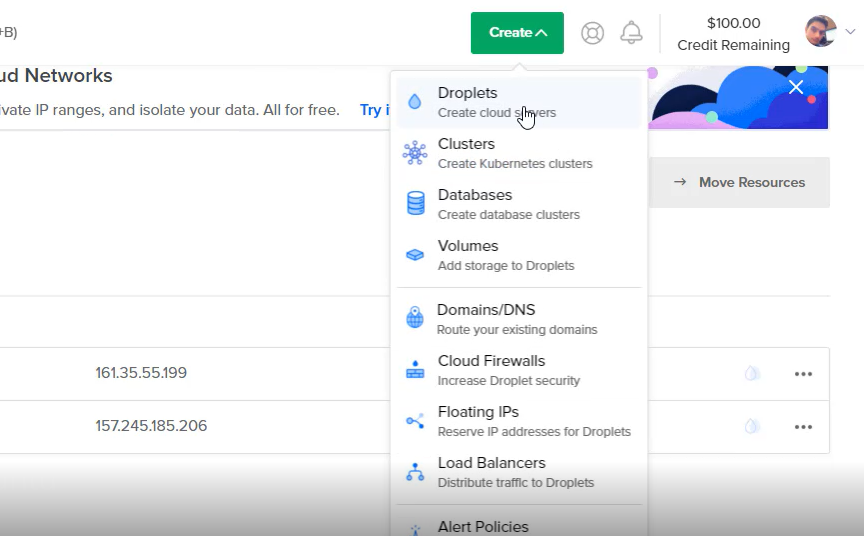
:-First Create a Vps Server.
- Go to Digitalocean And Create A Droplet
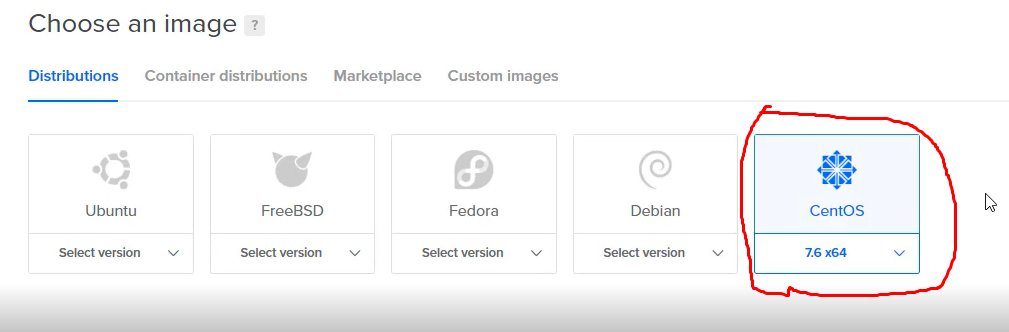
2. Choose an image
3.Choose a plan (i am using $10 machine)

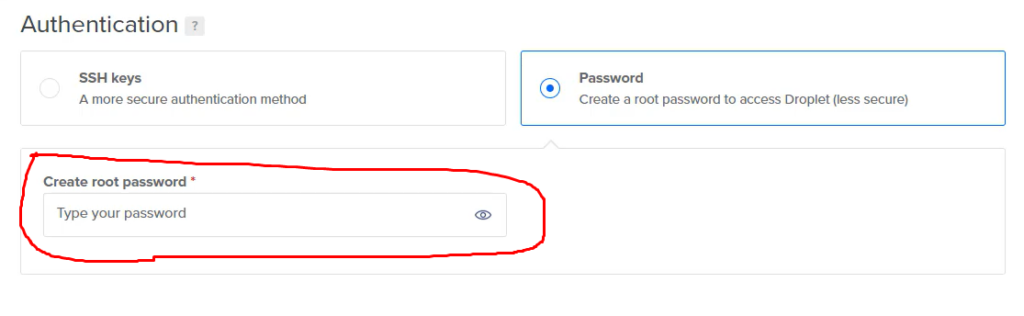
Enter Your Root Password:-
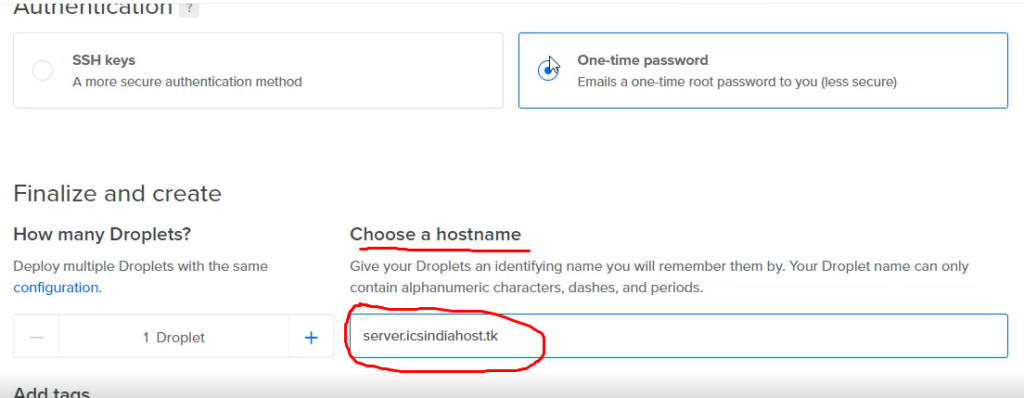
4.Choose a hostname
In Hostname Put Your Domain Name. i am Using Server.icsindiahost.tk. server is sub domain. Server.yourdomain.com
5.Now Click Create droplet. Few Minutes After You Receive a Email.
:-Install PowerMta Mail Server Using Putty
- First Open Putty Software And Put Your Server Ip Address.
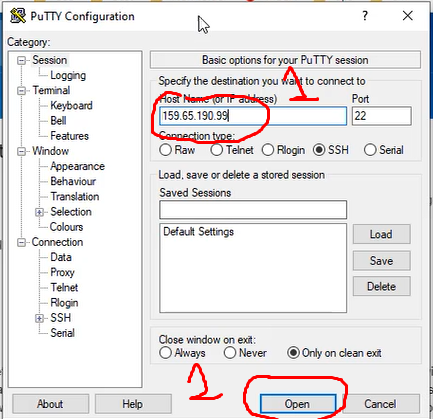
2. Now Login as Root User .
2. Install Php 7.3 On Centos 7
Install Php 7.3 on your CentOS 7 system with the commands below.
# yum install https://dl.fedoraproject.org/pub/epel/epel-release-latest-7.noarch.rpm
# yum install http://rpms.remirepo.net/enterprise/remi-release-7.rpm
# yum install yum-utils
yum-config-manager --enable remi-php73# yum install php php-mcrypt php-cli php-gd php-curl php-mysql php-ldap php-zip php-fileinfo
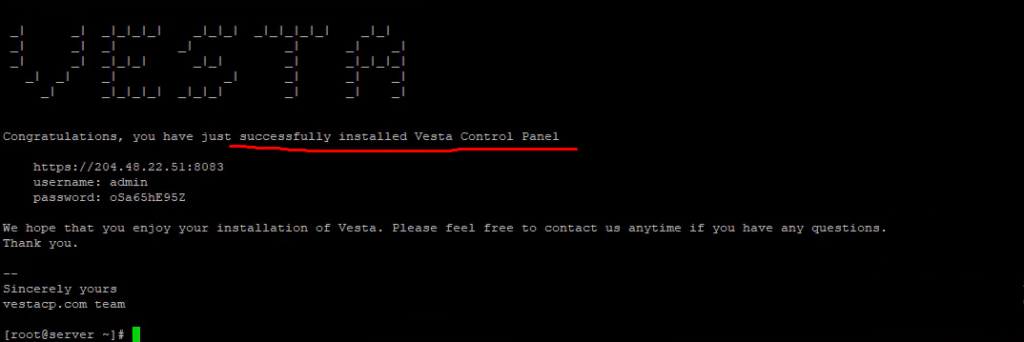
php -v3. Vesta Control Panel Install:-
- # Connect to your server as root via SSHssh [email protected]
- # Download installation script curl -O http://vestacp.com/pub/vst-install.sh
- # Run it bash vst-install.sh
- The installation is complete
4. Install WordPress On Vestacp:-
- Login to Vestacp Panel
- Select DB Menu
- Click + sign
- Create Database And User
- Go To Domain public_html directory => Home/admin/web/yourdomain/public_html
- Upload WordPress File
- After Unzip zip file
Now Run Your WebSite Url
Yourdomain.com/index.php
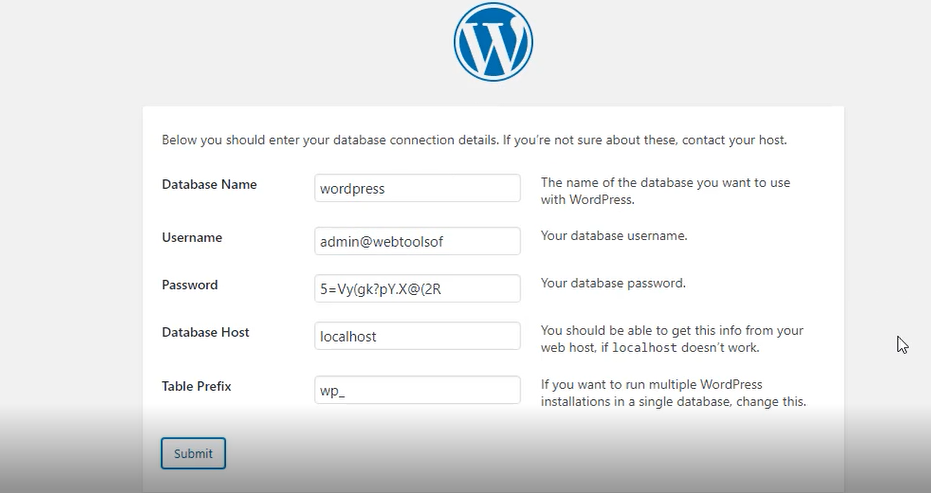
Enter in the following database information
- ‘DB_NAME’
- ‘DB_USER’
- ‘DB_PASSWORD’
- ‘DB_HOST’
After Putting all info click submit Button.
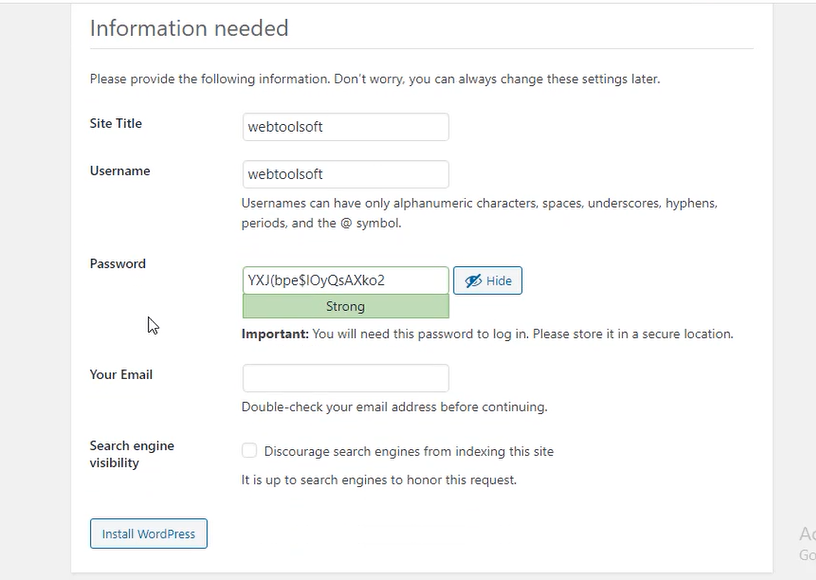
Fill in the following information
- Site Title
- Username
- Password
- Your Email
- Search Engine Visibility
Click the Install WordPress button at the bottom of the page
WordPress should now be installed and you should now be logged into your WordPress Dashboard.
Yourdomain.com/wp-admin/